| Index | |||
|
|||||||||||
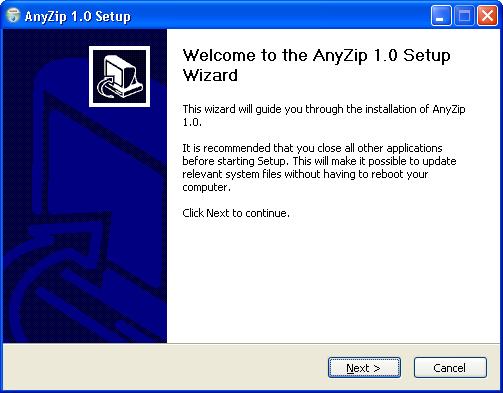
| Running the downloaded file anyzip.exe will launch the installation wizard, starting with the AnyZip Setup window below:
It is recommended that you save your work and quit all other running applications prior to commencing the installation of AnyZip. After you have closed all other applications, please click on the following button to start the installation:
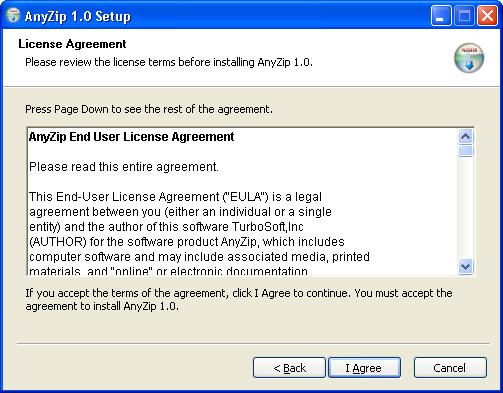
The resultant License Agreement screen displayed is as follows:
This page displays the AnyZip End User License Agreement, which contains the terms and conditions which govern your installation of the application on your computer. < In order to continue with the installation you are required to click on the I Agree button shown above. By clicking on I Agree you signify your acceptance of these terms and conditions. It is therefore recommended that you read these terms and conditions carefully prior to clicking this button. To read the full text of the AnyZip End User License Agreement, click here.
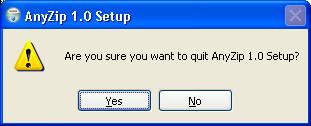
If you do not agree with the Terms and Conditions contained in the AnyZip End User License Agreement, you can choose the click on the Cancel button. When you do so, the following screen will be displayed.
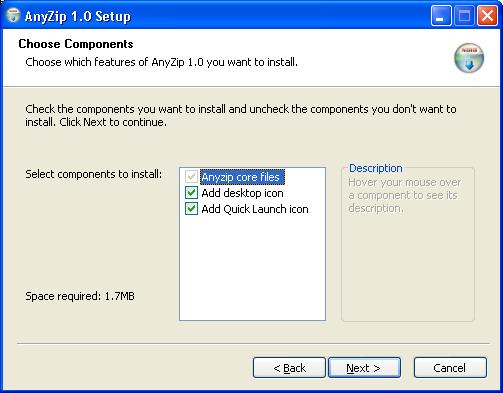
If you choose Yes, the installation will be stopped and AnyZip will not be installed on your computer. If you choose No, the installation wizard will return to the page from where you clicked Cancel allowing you to continue with the installation. The Cancel button is available on all screens in the installation process and you can click this button at any time to stop the installation. The next screen, Choose Components, allows you to customize some of the usage options associated with your installation of AnyZip. This screen provides three options - of which you can alter two.
This screen shows that the component of the application labeled AnyZip core files cannot be unchecked while installing AnyZip - this is because these files are required for running the application correctly on your computer. However, the other two options can be checked. A brief explanation of each of these options is as follows: Add Desktop Icon: If this option is checked, the Installation Wizard places a shortcut to the AnyZip application on your Windows Desktop. You can double-click this shortcut to launch the AnyZip application without having to browse through the listing of Programs in your computer. Add Quick Launch Icon: When this option is selected, the Installation Wizard places a shortcut to the AnyZip application in your Quick Launch Bar (which requires an installation of Microsoft Internet Explorer 5.0 or higher). This enables you launch the AnyZip application from within any application or Window. An example of including the AnyZip shortcut in the Quick Launch Bar is shown below:
If both these options are selected, a shortcut to AnyZip is placed on both the Windows Desktop and the Quick Launch Bar, and you can click either of these to launch the application. After choosing the components you require, click on the Next button to proceed with the installation.
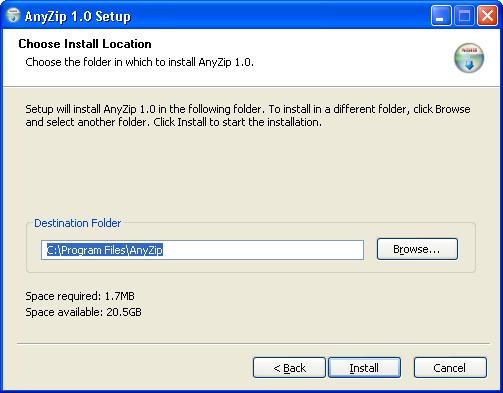
The resultant, Choose Install Location window allows you to specify which directory the application should be installed in.
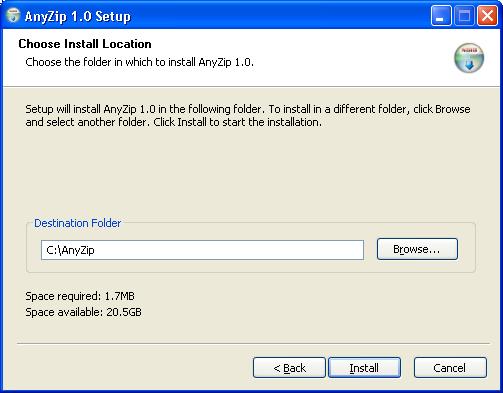
The default Destination Folder for this application is displayed in the box. However, you can choose to change this by: (a) Typing in your preferred path in the Destination Folder box, as shown in the example below:
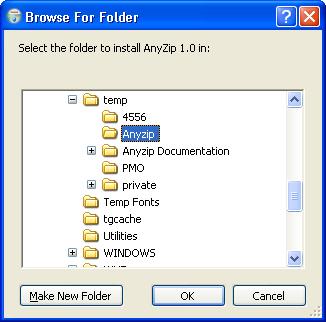
In this case, we have changed the directory for installation to C:\ AnyZip. (b) Selecting installation folder using the Browse window: You can also change the directory by clicking on the Browse button, which displays the following window
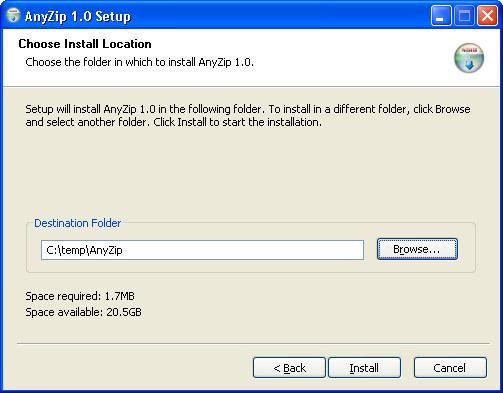
Based on the selection you make (as shown in the example above), the application will be installed in the directory titled C:\Temp\ AnyZip. You can also add the target directory from this window by clicking on the Make New Folder button provided.
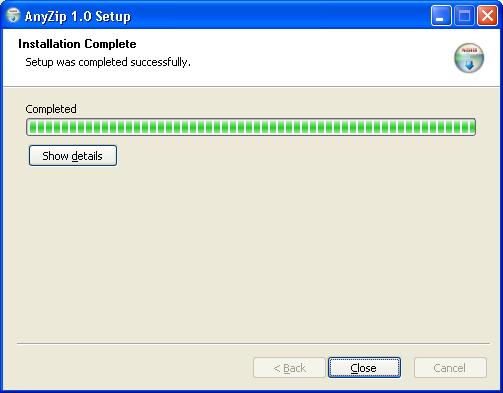
In this case we have chosen to retain the application default and install the application in C:\Program Files\ AnyZip. After the installation is completed, the Installation Complete window is displayed, showing that the application was successfully installed on your computer:
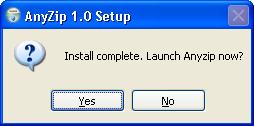
If you would like to see further details of the installation please click on the Show Details button, which will display information related to the folder in which the application is installed and the shortcuts that have been installed. You are now ready to start using AnyZip. You can do so by clicking the Close button from the above screen. In the resultant screen, which is displayed below, click on Yes to launch AnyZip. If you intend to open AnyZip later, please click on No to complete and exit the installation program.
You are now ready to use AnyZip on your computer |
|||||||||||

| Copyright (C) 2001-2006 TurboSoft, Inc. | ||
| |
||