| Index | |||
|
|||||||||
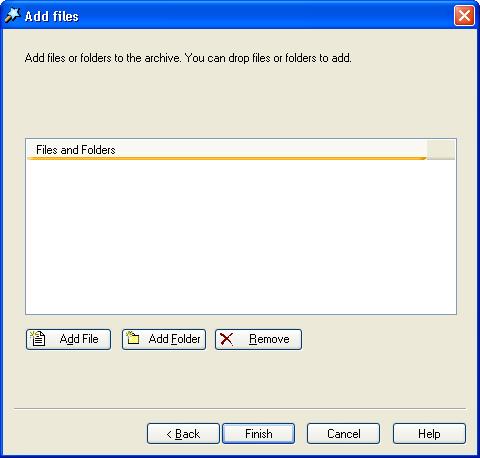
The AnyZip Wizard allows you to add files and folders to an existing archive or to an archive file during the process of creating a New Archive.
This window supports Drag-and-Drop to add files or folders to the New Archive that you are creating. In order to use the drag and drop feature, please open the Windows Explorer and the Add Files window next to each other. Drag Files and/or Folders to be added to the space provided in the Add Files window as shown below:
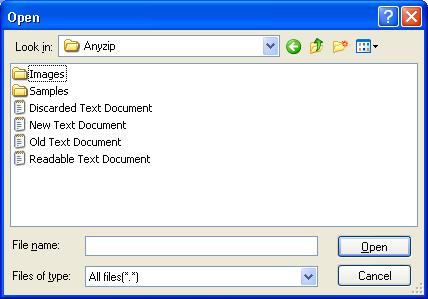
Please note that when you select a folder to be added this way, all the files and sub-folders within the selected folder will be added to the archive. If you want to select only specific files in that folder, you will need to open the folder and select the required files for adding to the archive. You can also add files or folders by clicking either the Add File or Add Folder buttons above. Add File: Clicking on this button will launch the Open window as shown below.
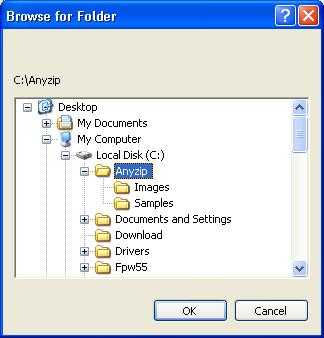
You can then change your source folder using the Look In drop down and then select the file to be added to the archive. To do so, highlight the file name and click Open. Please note that if you select the folder, and click Open, the folder will not be added to the Zip as this option only allows you to add specific files. In order to add files to the archive, select one file at a time and click open to add it to the archive. This screen currently does not support selection of multiple files using the Ctrl key. Add Folder: Click on this button to bring up the Browse for Folder window. Select the required folder and click on OK to add this folder and all the files within it to the archive file, as shown below:
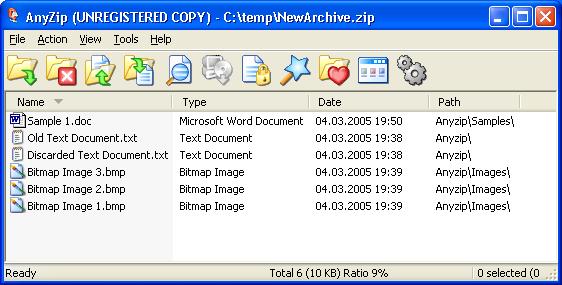
After you are done adding Files and Folders, click on Finish in the Add Files window to create the new archive. Based on the selections made, the new archive is created and displayed in the AnyZip Main Window as shown below:
Some of the files in this list were not explicitly selected during the creation of the new archive but have been added as they are all contained in a folder selected during the creation process. Also as the Path column shows the full directory path of the added files is preserved by AnyZip during the creation of the new archive.
|
|||||||||
| Copyright (C) 2001-2006 TurboSoft, Inc. | ||
| |
||