

Launch and log into TurboFTP Server Management Console
Double-click the "Local Server" node to bring up the Connect dialog, and log in with the administrator credentials you specified during installation.

Add a Domain
Select menu Manage -> Add Domain Wizard

Choose the services to use and change the port number if needed. We select HTTPS service. Click Next and assign the domain root folder.

Click Finish and start the domain. And check the status of the domain.

Assign "External hostname"
In the Domain -> Connection tab, make sure the "External hostname" is correctly populated. It can be the external IP or, preferably, the domain name (for example, mycloud.turboftp.com) to access the server. Apply the change.

Add a User
Select the Domain node, and select the menu Manage -> Add User Wizard. Specify the new user's username, password, and home directory.
Log into web UI
Launch a browser and enter https://mycloud.turboftp.com; you can see the web UI login screen. You can also upload and access your files through other enabled services like SFTP, WebDAV, etc.

Set up A Record of the Domain Name
Set up an A Record for your domain (details vary depending on your domain service provider) so that the domain points to the host's IP where TurboFTP Server runs on. (The Domain here means your Internet domain name.)
Stop TurboFTP Server
Make sure TurboFTP Server has stopped. To stop the service, go to Tools -> Local Service Manager.

Install IIS on Windows Server
Install IIS by adding a Web Server (IIS) role. Then launch Internet Information Services (IIS) Manager, right-click on "Default Web Site," and select "Edit Bindings". Click on Add button, and enter the domain name. Click OK to close the dialog.


Download and install win-acme from https://github.com/win-acme/win-acme.
Run wacs.exe in a command line box as administrator, and choose the N option to create the Let's Encrypt certificate. Once done, stop IIS completely.

Rerun wacs.exe, choose A: Manage renewals -> D: Show details for the renewal and copy the password of the private key.

Apply SSL Certificate in TurboFTP Server
Start TurboFTP Server service and make sure HTTPS is enabled by selecting Domain -> Connection -> HTTPS on port. Go to Server -> SSL Certs tab and click on the Import button. In the dialog, browse and choose the new certificate bundle file (the one with .PFX extension). Check off the option "Certificates and private key in a single file". Enter the copied passphrase of the SSL private key. Click OK to import the certificate.


Now go back to the Domain -> Connection tab, and select the imported SSL certificate used for the domain. Click on the Apply button and restart the domain.

The domain is now running with Let's Encrypt certificate.
TurboFTP Server Corporate version provides WebDAV service with file locking support. Authoring or editing software like MS Office suite comes with built-in WebDAV support and speaks WebDAV's file locking protocol, which makes it possible for multiple users to work on the same document safely and efficiently.
In this article, we demonstrate files residing on a WebDAV mapped drive, backed by TurboFTP Server, can be accessed by Office software, and the exclusiveness of write access is achieved. In our example there are two Windows machines, A and B. A has Office 2007 installed, and B has Office 2016 installed.
An important pre-requisite for WebDAV collaboration to work is to ensure date and time are
a. Map TurboFTP Server WebDAV share as a network drive on Windows boxes A and B.
b. Open a file called book1.xlsx on A, and make the modification. If during this time it is opened on B, Excel will notify that the file is in use (Fig. 1). B can only open the file in read-only mode and you can choose to get a notification when the file is ready for opening in read-write mode. Click Notify. 
Fig. 1: Excel shows file on WebDAV share is in use.
c. Close and save book1.xlsx on A's Excel 2007. After a
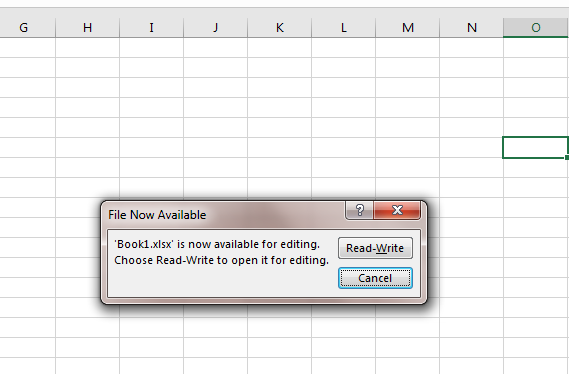
Fig. 2 Excel shows the file on WebDAV share is available for editing.
TurboFTP Server supports Windows version of MS Office 2007, 2010, 2013, 2016 and 2019. In addition, it supports MS Office for Mac 2011, 2016 and 2019.
Microsoft Windows exercises more restricted security control when connecting to a WebDAV Server over HTTPS. The server must have a valid SSL certificate for its domain name or IP. Further configuration is needed if the certificate is self-signed; otherwise, the connection fails with suspicious error messages. In our example, the WebDAV service runs on IP 192.168.56.2 and uses a self-signed certificate (for example, one generated through SSL Certificate Creation Wizard in TSRMC). Steps 1 and 2 can be skipped if an SSL certificate file is already present.
1. Access the following URL in the browser.
https://192.168.56.2
2. Click on the 'Site Information' icon in the browser's address bar and, open the certificate information dialog, export the certificate to a local file, e.g. 192.168.56.2.crt. If you are using Internet Explorer, you might need to run it as an admin to be able to export the certificate.
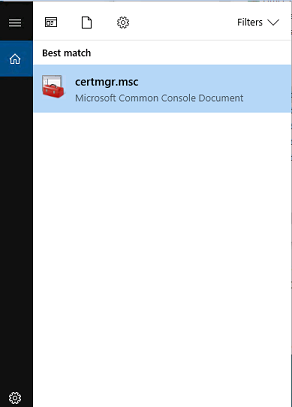
3. Click the Windows Start button to search for program certmgr.msc.
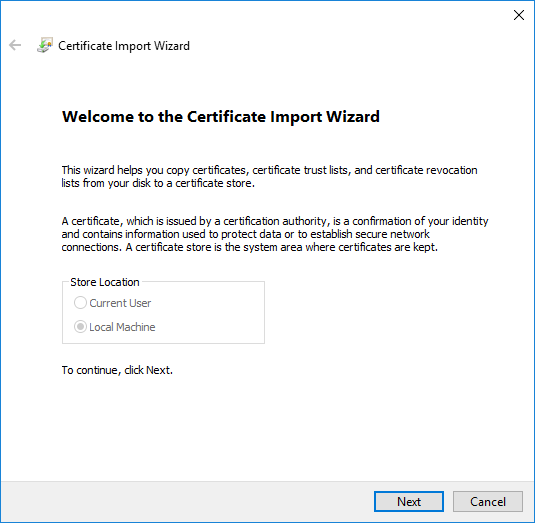
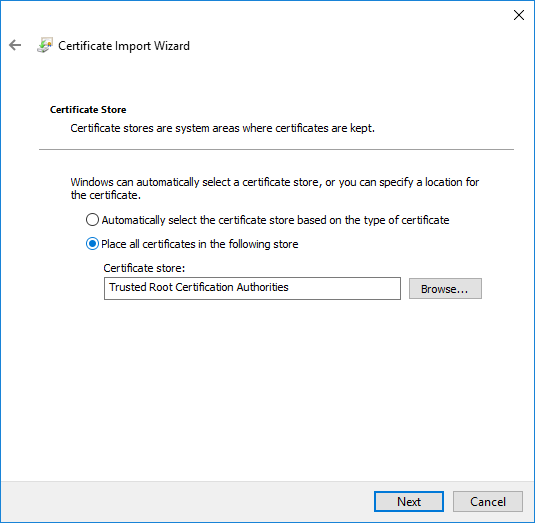
4. Right-click Certificates -> Trusted Root Certification Authorities, and select All Tasks -> Import to bring up the Certificate Import Wizard. Use the Browse button to provide the exported certificate file, and click Next.

5. Select Place all Certificates in the following Store. Click Browse, check the option Show Physical Stores, expand the tree, select Trusted Root Certification Authorities -> Local Computer, then click OK and Finish.
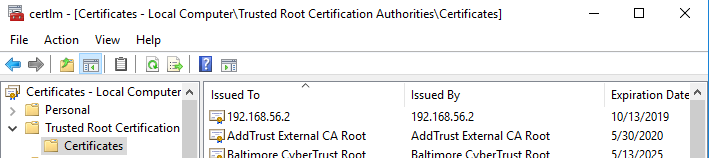
The self-signed certificate has now been imported. You might need to re-launch certmgr.msc to see the effect.
Now we can map the WebDAV path as a network drive.

TurboFTP Server (with HTTP/S feature enabled) supports WebDAV protocol. Microsoft Windows, macOS, and Linux all have built-in support for WebDAV, allowing you to connect to a WebDAV share within the file browser. You can also mount a user's home directory under Linux using davfs2. The following shows an example of setting up a WebDAV mount point for Ubuntu Linux user
davs://192.168.83.1/dav
Now he wants to mount the WebDAV folder under /mnt/
# install davfs2
$ sudo apt-get install davfs2
$ sudo dpkg-reconfigure davfs2 (if not done in installation)

# set(create) the mount point
$ sudo mkdir /mnt/mydav

# add mount option in /etc/fstab
$ sudo vi /etc/fstab

  https://192.168.83.1:8443/dav /mnt/mydav davfs user,noauto,file_mode=600,dir_mode=700 0     1

# might need to log out and log back in to have it take effect
$ sudo usermod -aG davfs2 jason

$ cd; mkdir .davfs2

# set up WebDAV user credentials
$ vi .davfs2/secrets

  https://192.168.83.1:8443/dav jsmith        PASSWORD

# mount the file system
$ mount /mnt/mydav